
Volcano Classic & Digit – Switch Replacement Guide
Update 01/20/2022
Please be sure you have a Genuine Volcano from Storz and Bickel. Our parts do not work on anything but the Real unit. We will not refund you if you have a counterfeit unit!. Please make sure you have the Real thing..
See this Article here for more info on Fake volcanoes.
How to spot a fake Volcano click here.
DepotEco Assumes no liability for your installation of this switch please see our Terms and Conditions
Note, this item is not authorized for resale without our prior written consent. Please beware of impostor’s selling our wares, buy your Volcano replacement switch from DepotEco.

We all love our Volcano’s, but it does happen that the most touched and abused part of the unit is the switches. To combat this issue and to provide folks with the ability to replace the switch at home we sourced the replacement OEM switch and stock them at DepotEco.
First we must tell you that the manufacture has a great warranty program and is happy to repair your unit if you desire. Just give them a call. However for most people the replacement of the switch is a very simple task that does not merit boxing up and shipping off your unit for repair.
If you wish to replace the switch yourself at home simply follow the guidelines below in-order to complete the tasks.
(Beware of switches that look the same but are not the “Real Replacement Switch”.
The guidelines below are only for the Volcano Classic , Volcano Digit and the replacement rocker / momentary switch’s as sold by DepotEco)
First, you will need a Torx screwdriver tool to remove the case screws. Older Volcano units shipped with T8 Torx Screws and then began shipping with T8 Security Torx screws. Newer units also now ship with a T10 Security Torx screw.
(Please verify your screw types T8 or T10)

The Volcano Digit requires a Torx Security screwdriver with the hole.
The older Volcano Classic requires a standard T8 Security Screwdriver as above.
Note* Please make sure you have T8 screws for this driver to work. Some units have T10 and other non standard screws.
Next you will also need a replacement rocker or momentary switch from DepotEco.
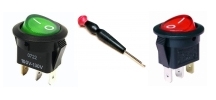
Rocker style switch for Volcano Classic (switch tops are slightly different on the replacement switches, the classic switch has a “on off marking” printed on switch as pictured)


Or pick up the Classic combo that includes the T8 and T10 tools to open the case
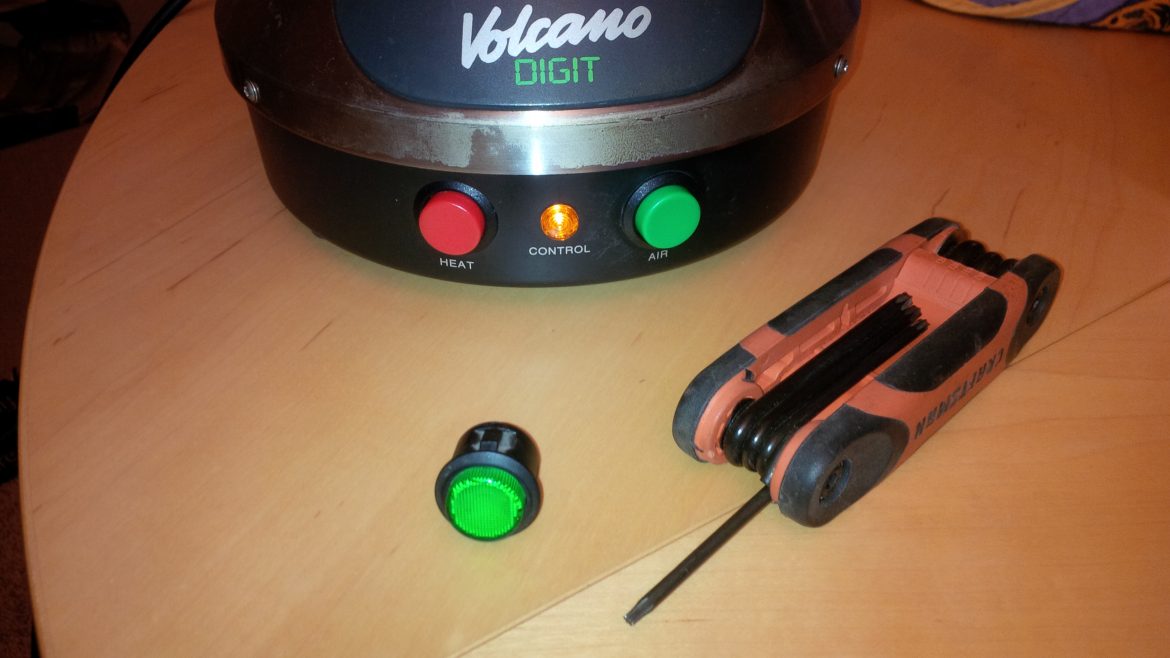
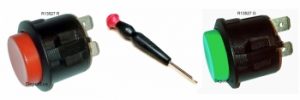
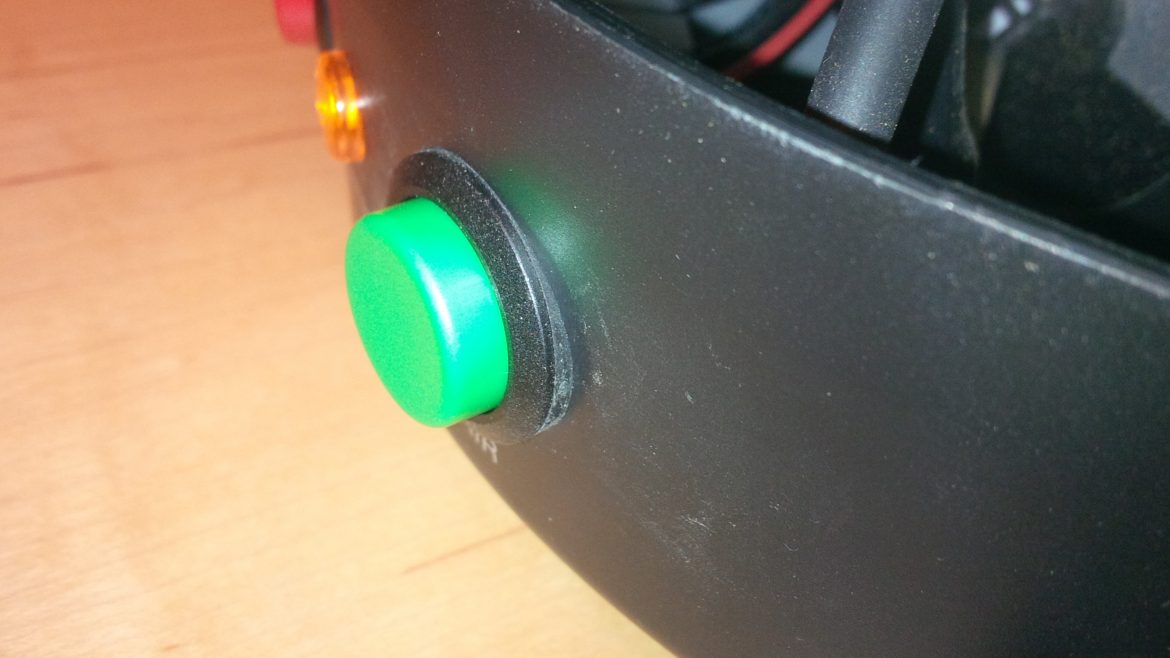
Momentary style for Volcano Digit (switch tops are slightly different on the replacement switches, the digit switch has a “Solid” red or green cap as pictured)


Or pick up the Digit combo that includes the T8 and T10 tools to open the case.
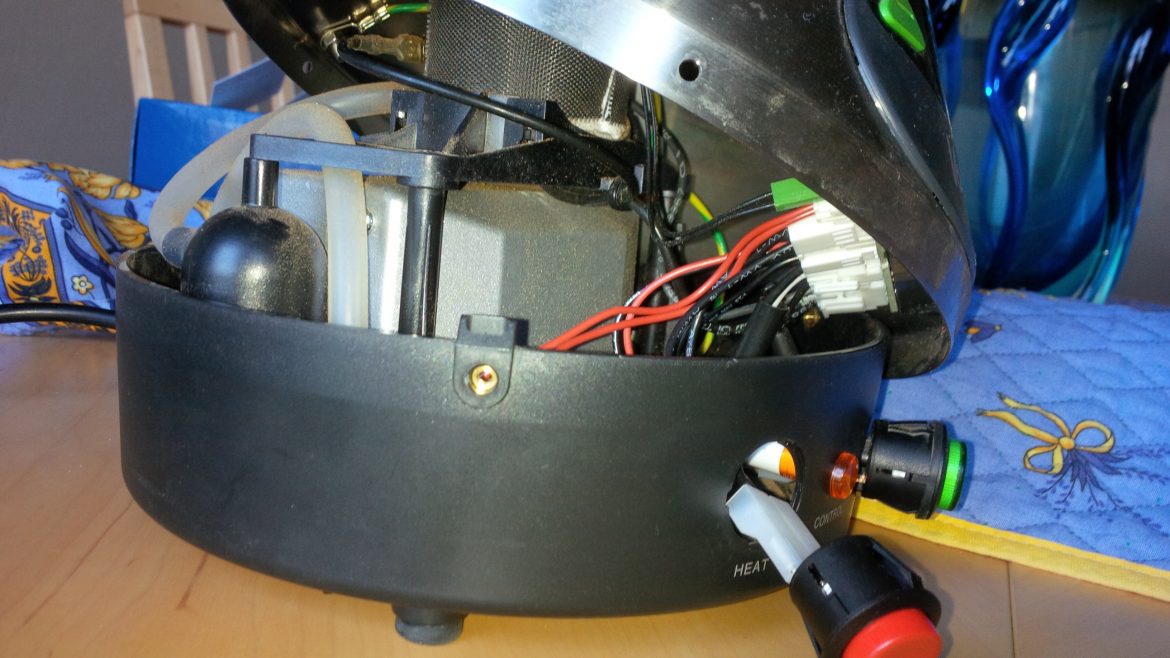
Once you have your switch, unplug the unit from your power source and remove the 3 screws from the cover. On the Volcano Classic to remove the cover you do not need to try to remove the heat control knob. Simply lean the cover towards the heat control knob and lift up to remove and set aside.
The cover is grounded with a wire to the base so it won’t go far.


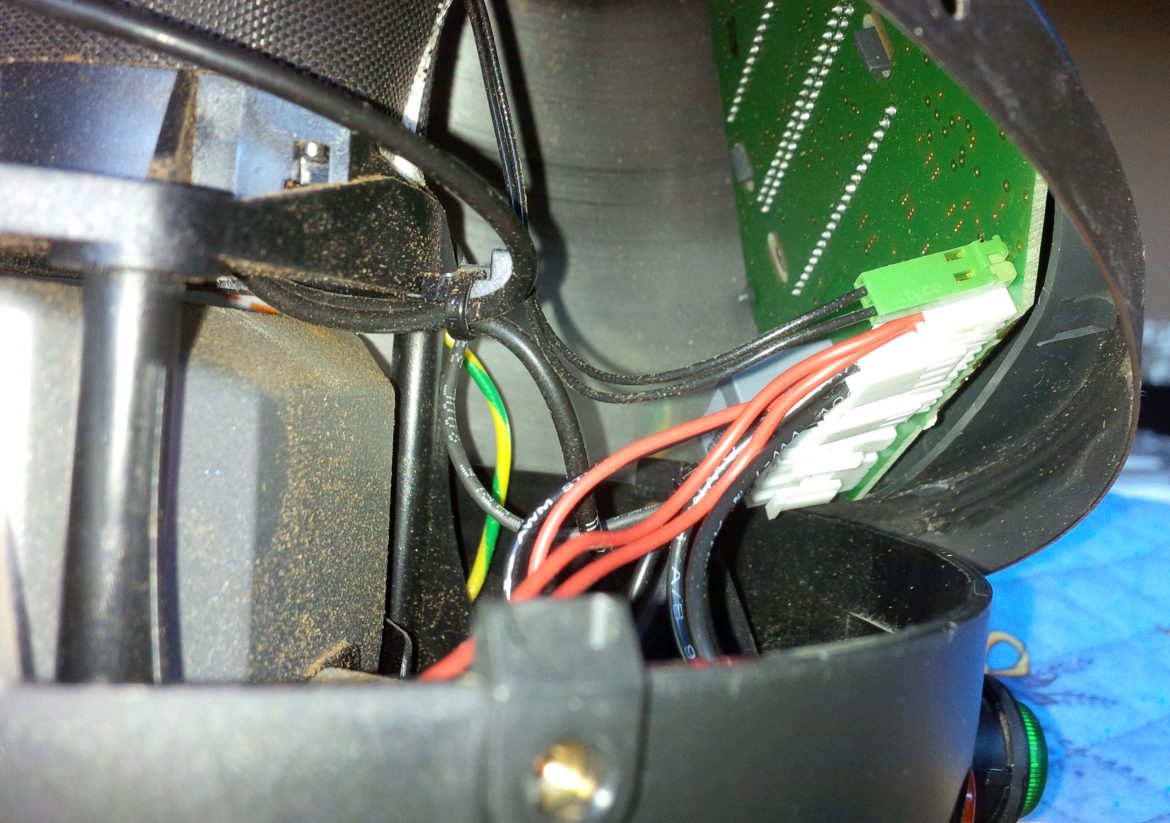
The Volcano Digit does not have a “Heat knob”. But the Digit cover is attached by the inner control board and a very short wiring harness. You can carefully lift the cover up and unplug the connections from the control board. Lay the unit on its side for easy access to the control board connections. You may only need to unplug a few of them to access your switch. Please Keep track of the plug locations for reassembly.
Next, to remove the old switch you will need to press on the retaining tabs that hold the switch to the base of the unit.
This is the same process for the Volcano Digit.

Use your fingers to squeeze the retaining tabs and gently push the switch out of the hole.


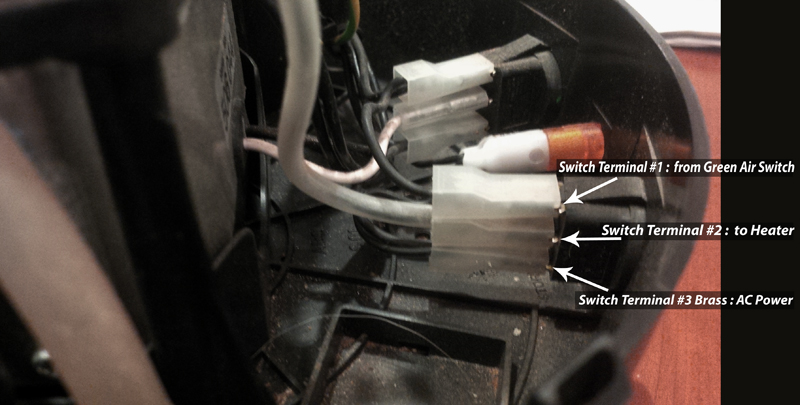
Unplug the 3 wires and leave the connectors in order (top, middle, bottom) so you know how to replug them later.
If you have a Volcano Digit You will unplug 2 wires from the back of your switch that connects to the control board.
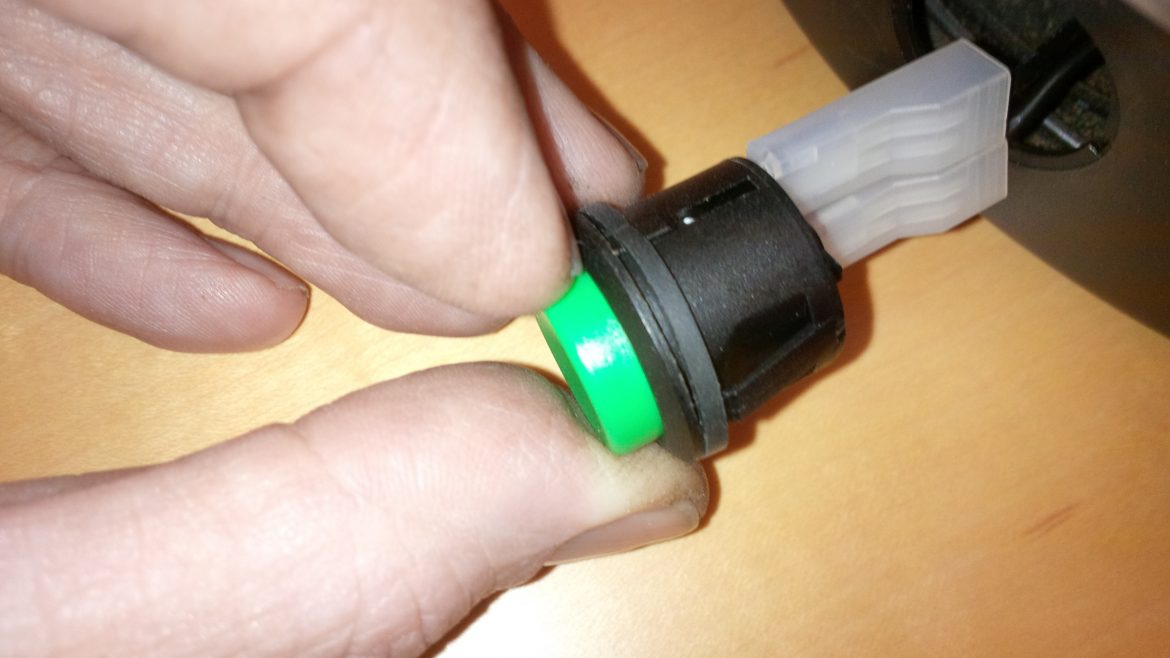
Remove the Rubber O ring spacer that you will find just behind the old switch surface collar.
Save this to put on your new replacement switch. (Not all units have this if your does not proceed without it)

Before you insert the Volcano Classic replacement rocker switch, look for the numbers 1, 2, 3 on the 3 contacts for the wires. Contact 1 belongs at the top. Notice that the on/off markings on the front of the switch are aligned with the “o” up for on.
Slide on your old rubber “O” ring spacer washer if your unit had one.
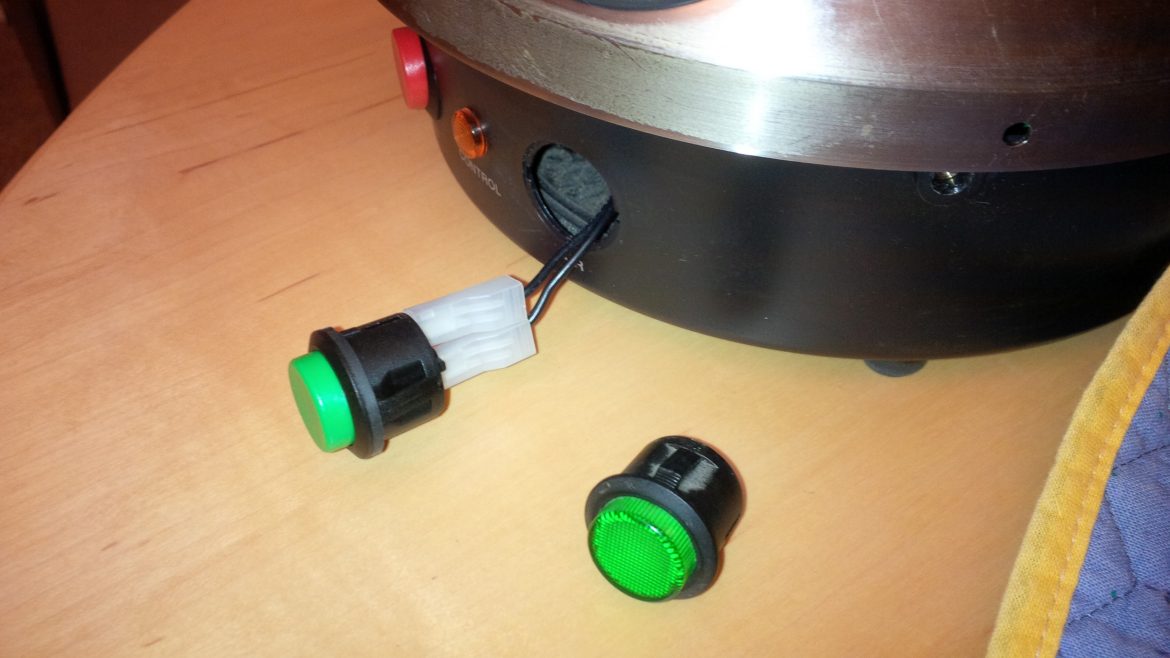
Volcano Digit uses a push button momentary on switch it has no face markings. Plug in your 2 wires as you removed them.
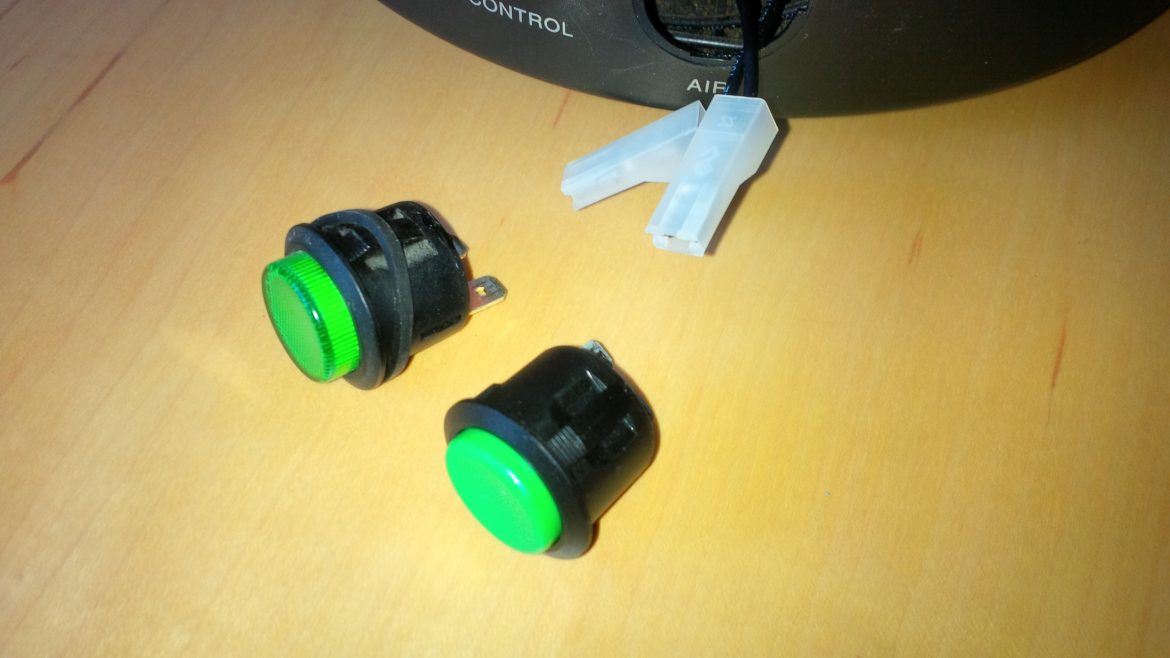
Notice the replacement switch top is a sold green cap (on right) and not clear with green backing (on left) like the original. You will find the Replacement switch tops will have new markings or a clear top replaced with solid color tops.
Line up the switch so the indexing blades fit in the slot to hold the switch level. It will not go in the hole until you have correctly aligned the indexing blades.
Then gently press the new replacement rocker switch into the hole while attaching the wires before you seat the switch in the the base of your unit.
After you have made your wire connections you may seat the switch in the base.

Next we suggest you test the unit before you replace the cover.
Please plug your Volcano into a Plug Strip that has its own builtin fuse/breaker. This way if you have mis-wired the unit it will pop the plug strip fuse/breaker and not the House breaker in your service panel! Then you can correct your mis-wireing and reset that fuse/breaker on the plug strip and test the unit again.
Volcano Digit users make sure you re-plug in your control board and all of the connections you may have unplugged.
And remember you might want to replace the security Torx screws at this time as well. We include new Hex Screws in the Combo kits that will work with any standard Allan Hex T8 driver and of course they work with the driver tool we include in the combo kits.
Enjoy your new replacement volcano switch from DepotEco.com
DepotEco Assumes no liability for your installation of this switch please see our Terms and Conditions
Be sure to Read This post if you are having issues with your Volcano Classic Heating up.
https://www.depoteco.com/blog/volcano-vaporizer-thermostat-heating-issues/
They are HERE 🙂
Update ! – The Volcano Digit Switches are here.
Thanks for the sample switch! Took me 2 minutes to swap out the switch and it is a perfect fit and works great!
You are very welcome you are then 2nd person now to use the Volcano Digit replacement switch!. IT took a while to source it but we should have them in Stock in December!.
Can you do this with the digital version?
What would the difference be with the connections to the digital LED readout?
Thanks for any help.
Nate, WE are working on sourcing the Switch for the Digital. The Difference is the Digital does not have an illuminated rocker switch.. it has a push button with no light.. So you could use the Switch for the Classic, But you would not be able to connect the Light in the Switch as the Digit uses a Single Pole with no light. Email me back if you want to try one.. I am happy to send one your way for a test.
Thank you so much for the switch. We needed this right away and not only did you have it but this information helped me understand that I did not need to try to remove the Heat control Knob.. Thank you
The directions helped. i.e. saved a lot of frustration. Since the only choice was to send the whole works back to the manufacturer it was much simpler option. This looks like a switch I have seen on other appliances. Do you have a list?
Tom, Thanks for that. And yes the Switch fits Bissell 37603 Vacuums and more.